Settings
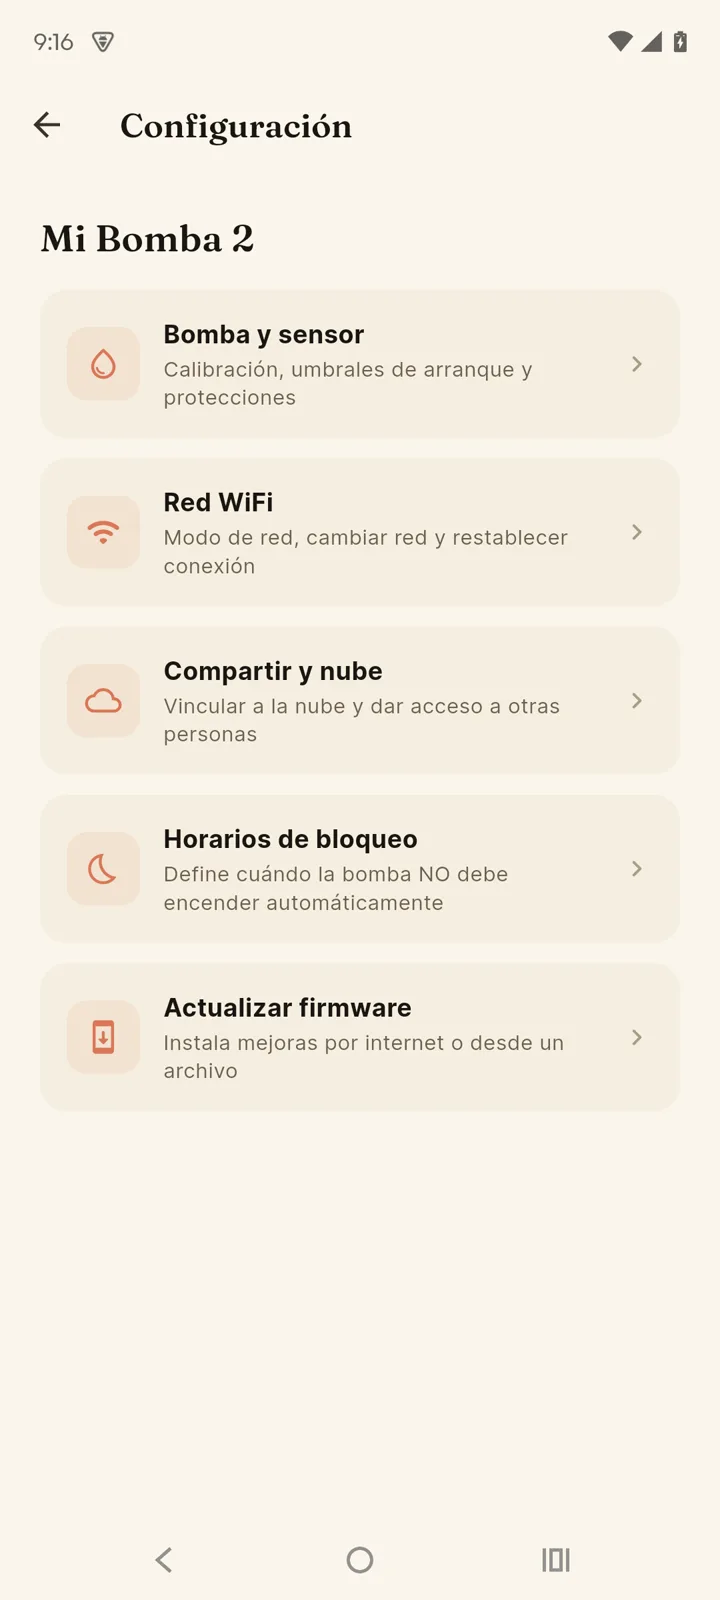
The gear icon on the main screen opens the device's full configuration, organized in categories.
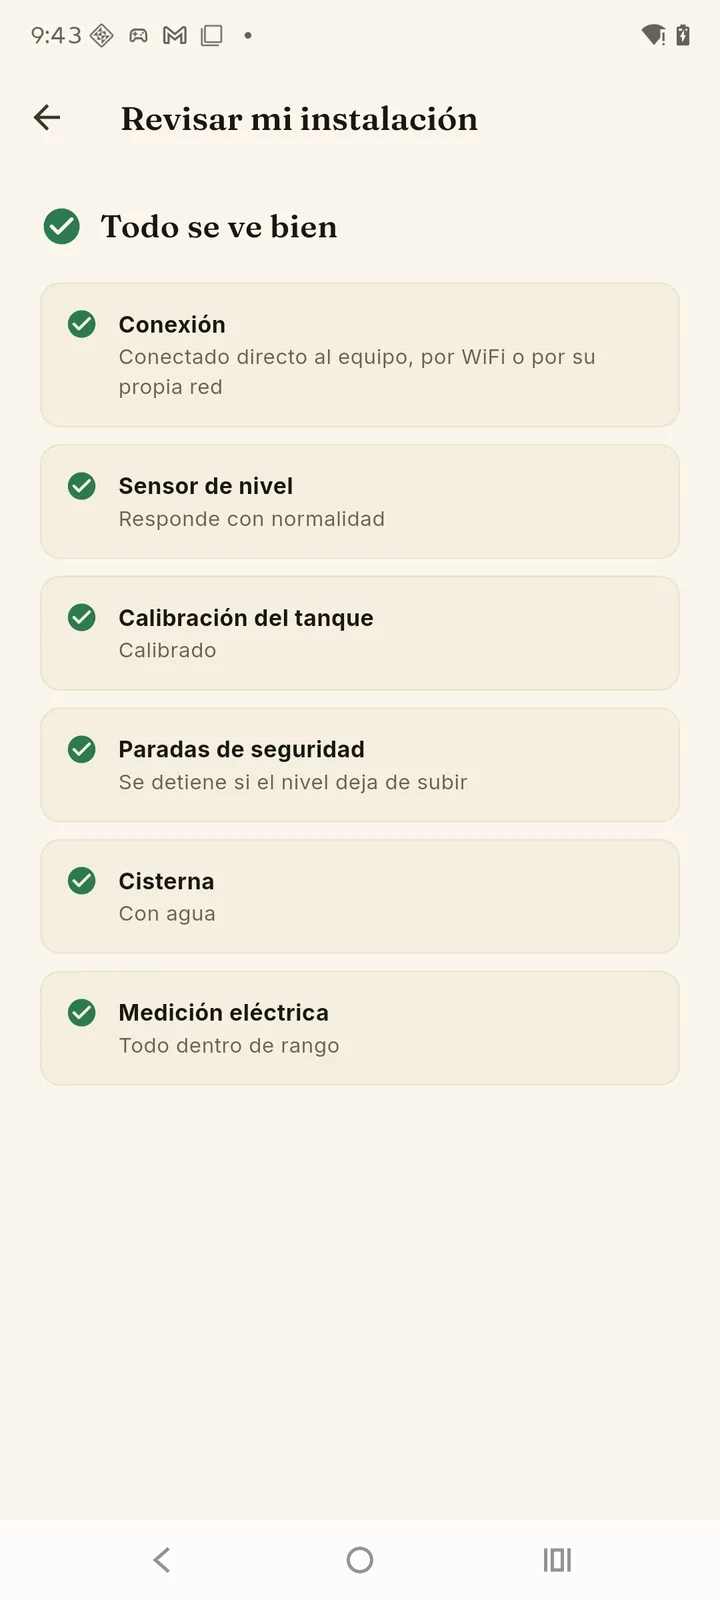
Check my installation
The first option in the menu brings together on one screen what's usually scattered: connection, WiFi signal, level sensor, tank calibration, safety stops, cistern and, on the model with metering,electrical metering. Each item shows green or tells you in plain words what to check — for example that the tank isn't calibrated yet or that the WiFi signal is weak. It's the first thing to look at when something doesn't add up.
Pump & sensor
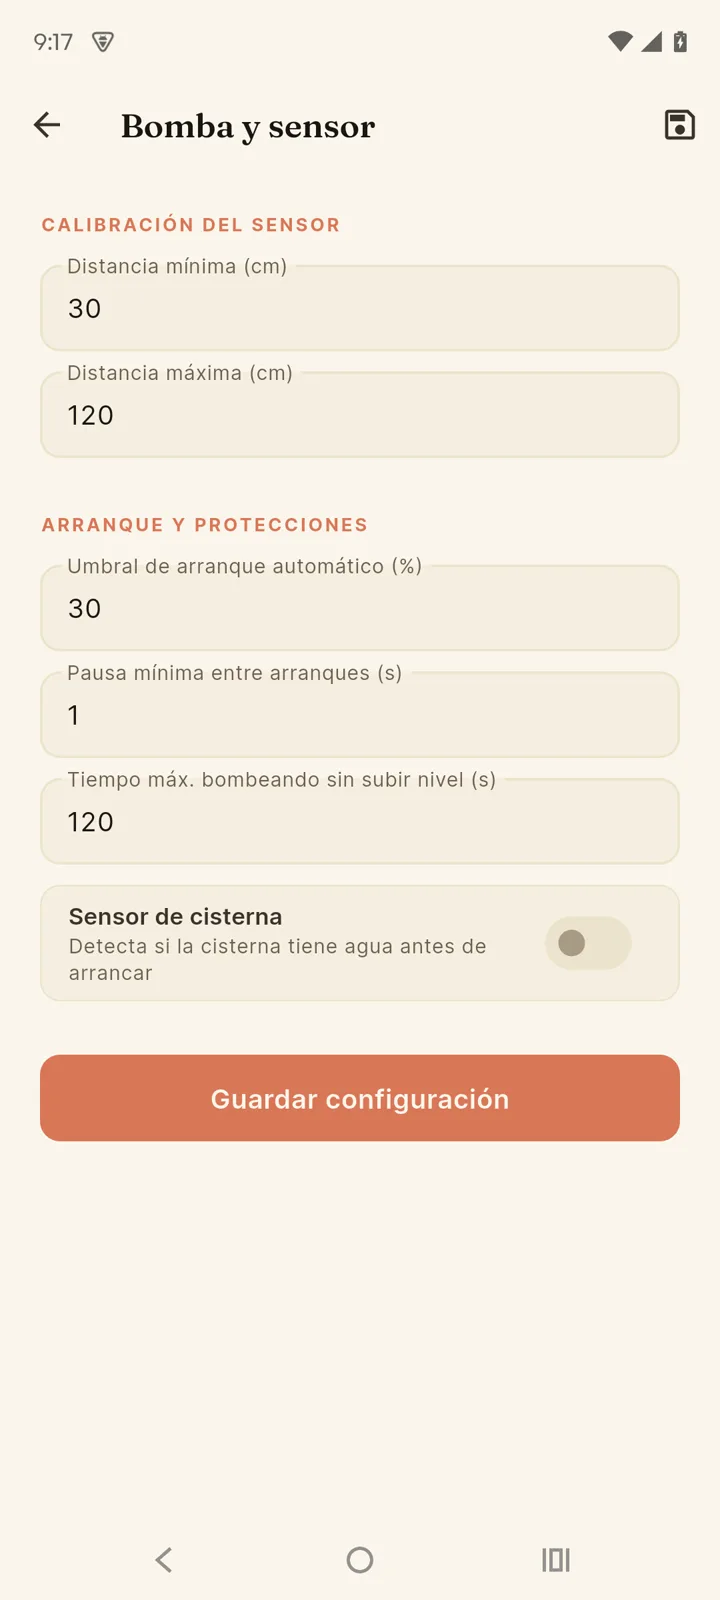
Sensor calibration
The ultrasonic sensor measures the distance from the tank lid down to the water surface. To turn that distance into a percentage, the device needs two references:
- Full tank: distance (cm) — from the sensor to the highest the water should get: the bottom edge of the overflow pipe (or the tank's top rim if it has none). That's 100% and where the pump stops. The shortest distance.
- Empty tank: distance (cm) — the 0%: from the sensor down to the height of the pipe the water leaves through, which is almost never at the very bottom but some 2 in (6 cm) above it. The longest distance. Do not measure to the bottom: below the outlet there is still water the tank no longer delivers, and counting it makes the device think there is reserve left when nothing comes out of the tap any more.
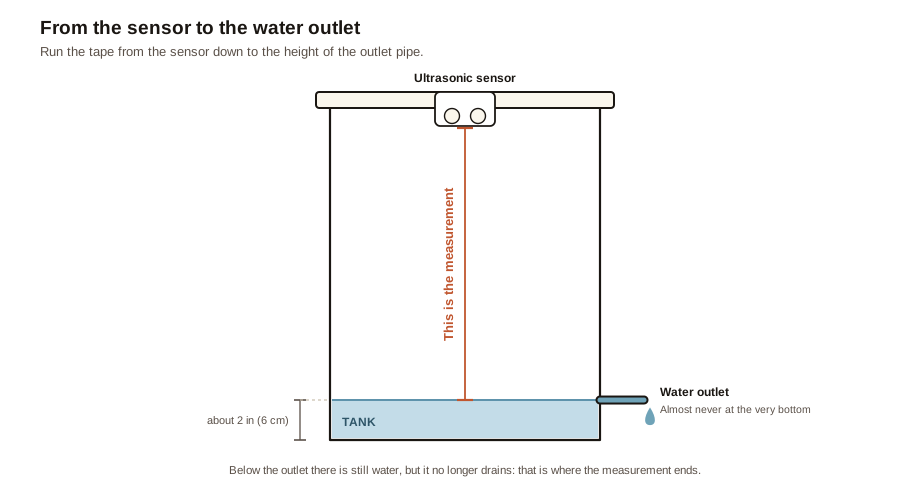
Easiest: the wizard. Tap "Calibrate again"and the app works out both distances for you from two tape measurements (sensor to water outlet and sensor to overflow), and checks them with the sensor — the same wizard as in pairing. The fields below are for fine-tuning by hand if you prefer.
The full-tank distance shouldn't go below 30 cm (12 in).That's the ultrasonic sensor's blind zone: closer than that, the echo comes back before the sensor finishes emitting, and readings come out false (level that jumps around or freezes). If your tank is shallow and the full-water level sits closer than 30 cm to the lid, mount the sensor a bit higher instead of shrinking the threshold.
Start & protections
| Parameter | What it does | Values |
|---|---|---|
| When should the pump start on its own? | In Automatic mode, the pump starts on its own when the water drops to this level, and fills the tank to the top. Move it with the − / + buttons or the slider: the drawn tank marks with a line where it will start. | Between 5 and 90%. Factory setting: 30% |
| Minimum pause between starts (s) (advanced) | Mandatory rest between a stop and the next start. Protects the motor from rapid cycling. | Number ≥ 0 |
| Stop if the level doesn't rise within (min) | While the pump runs, if the level doesn't rise at all for this long, it stops on its own and logs a Pump fault. Catches dry running, broken pipes, closed valves or a failed sensor. The count restarts every time the water rises 1 cm (up to firmware 1.15.4, 1%), so as long as the tank is filling — even slowly — the pump keeps going. | Blank = no limit Factory: 2 min |
| Max. continuous pumping (min) (advanced) | An absolute cap: stops the pump once it has been running this long straight, whether or not the level is rising. Covers the failure the one above can't see — the level does rise but never reaches 100% (short calibration, a leak taking nearly everything, an overflowing tank); there the one above never trips, because it keeps gaining its 1%. Set it to how long a fill from empty takes plus a generous margin. Note: like every other automatic stop, it does not apply in Manual mode — there you are in charge, and the device only stops if the cistern runs dry. | Blank = no cap Factory: no cap |
| Wait after a power cut (min) (advanced) | After a power outage or restart, the device waits this long before letting Auto mode start the pump — protects the motor from unstable voltage right as power returns. The rest of the device (display, sensor, app) works normally during the wait; only the automatic start is delayed. | Between 0 and 30 Factory: 3 min |
| Cistern sensor | If your water comes from a cistern with the level sensor (float switch) installed, the device checks there's water available before starting the pump — and stops it if the cistern runs dry. | On / Off Factory: off |
| When there's water, the float contact… | Shown when the cistern sensor is on. Tell the device whether your float switch closes or opens the contact when there's water, and check it with the live reading below: lift the float by hand and it should say there's water. See Installation. | Closes / Opens Factory: closes |
The ones marked (advanced) are tucked behind"Show advanced options" at the bottom of the screen, together with the tank capacity and the data saver. They ship with sane defaults: the device pumps just fine without you touching them.
If you don't have the float switch installed, keep the cistern sensor off — enabling it without the sensor would prevent the pump from starting.
Tank capacity (optional)
Inside "Show advanced options".If you know how many liters your tank holds, enter it here to see consumption in liters as well as percentage — used byConsumption analytics. If you don't know it, leave it blank: everything still works the same, just in percentage.
- Nominal tank liters — the tank's factory capacity (what's on the label or the manufacturer's spec sheet).
- Usable liters (advanced) — if your tank never fully empties or never truly reaches 100%, adjust the actually-usable volume here. Optional: leave it blank to use the nominal liters.
When you're done, tap "Save configuration". Changes apply to the device instantly.
WiFi network
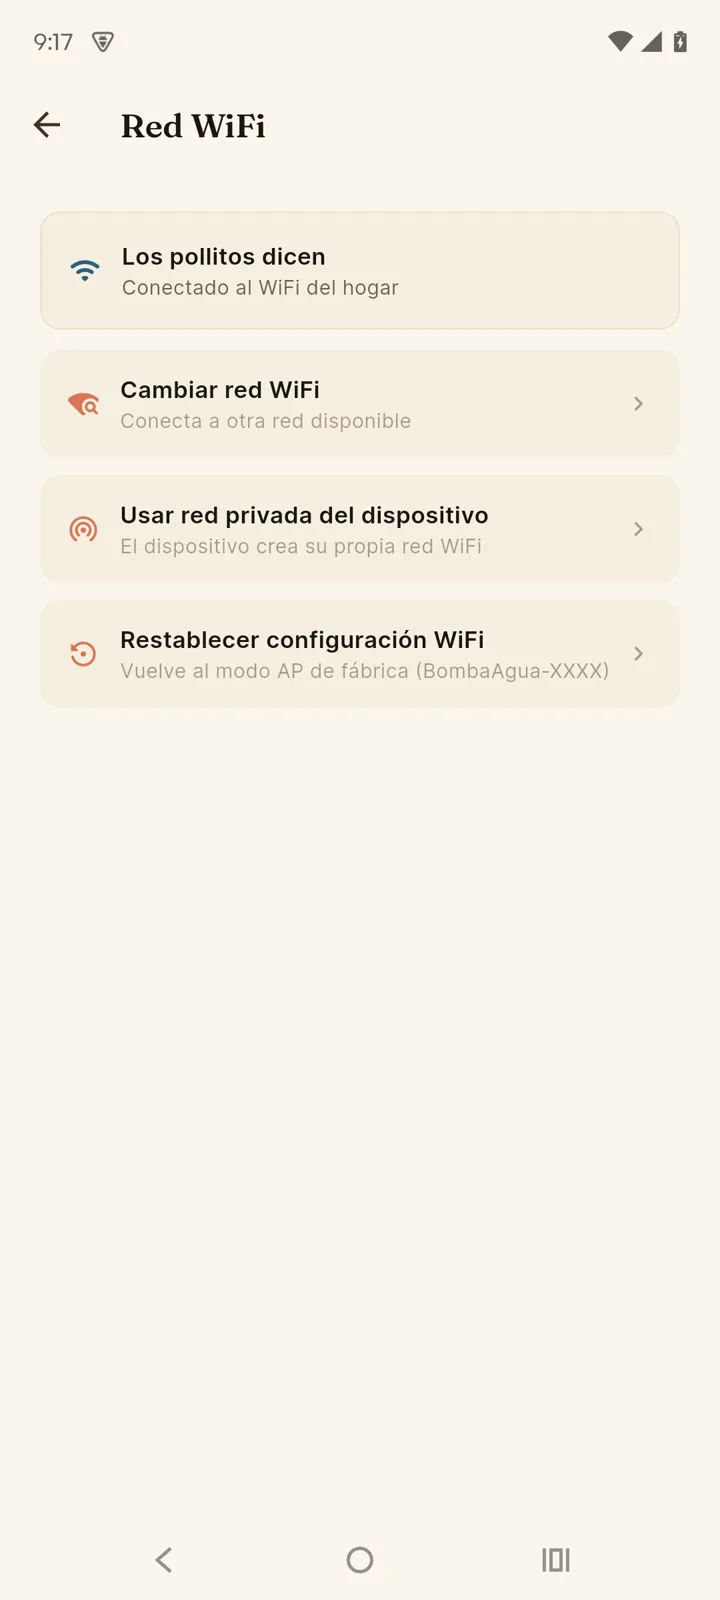
The screen has three parts:
Current status
Shows which network the device is on right now, the mode (private network or home WiFi), its IP address and whether it's using the cloud ("Cloud active" or "No cloud") — the first thing to check when something won't connect.
Operating mode
Choose between "Device's private network" (the device creates its own network, no internet or cloud) and "Home WiFi" (remote control, notifications and cloud history). Switching modes restarts the device with the new configuration.
If you're already controlling the device over the internet (remote mode), the app tells you that you need to be physically at home, on the same network as the pump, to change its WiFi network.
Connect to another WiFi network
Switch the device to a different available network (e.g. you changed routers). The device scans and you pick the new one — this only appears once the device is already in "Home WiFi" mode.
Reset WiFi configuration
"Reset WiFi configuration" erases the network credentials and returns the device to its factory network (BombaAgua-XXXX / bomba1234), like new out of the box — but keeping your calibration, thresholds and schedules. The app then guides you through pairing again.
Local access PIN
Your device serves its own little web page: type its IP address into the browser of any phone or computer on the same WiFi network and you can see the level and control the pump without the app. Handy — but it also means that, unprotected, anyone on your network can do it: a guest you gave the WiFi password to, or someone who got hold of it.
That's why you can set a 4 to 8 digit PIN fromSettings → WiFi network → Local access PIN. With a PIN set:
- Your app stores it automatically: you'll never have to type it again.
- A browser asks for it once per device and remembers it.
- Anyone without it can still see the level, but can't turn anything on or off or change settings.
- If you share via QR code, the PIN travels inside it: nothing changes for your family.
Forgot the PIN? Hold the device'sSTART/STOP button and release it when the screen says "Suelta para ver el PIN" (release to see the PIN, at 3 seconds; if you wait until "Suelta para cancelar", nothing happens). The PIN shows on its screen for 15 seconds; if none is set, you'll see "Sin PIN puesto" (no PIN set). It can never be read over the network — you have to be standing at the device, and that's exactly what makes it safe.
The PIN doesn't apply while the device is on its factory network (BombaAgua-XXXX) before your WiFi has been set up, since that's the state pairing goes through. If the device was already on your WiFi and brings that network up only because the router isn't answering (after a power cut, for example), from firmware 1.15.5 the PIN is required: the app sends it by itself. It isn't needed in private networkmode either: there, the device's own network password already does the job. Where it really matters is with the device on your home WiFi.
You can change or remove it any time from the same screen. A WiFi reset keeps it; a factory reset erases it along with everything else.
Block schedules
A block schedule defines windows when the pump must NOT start automatically — overnight to avoid noise, or during expensive electricity hours. Manual control always stays available: blocks only hold back Auto mode.
Beta feature. It hasn't been fully tested yet: if it doesn't block when it should, or blocks too much, let us know. Don't rely on it to protect your installation.
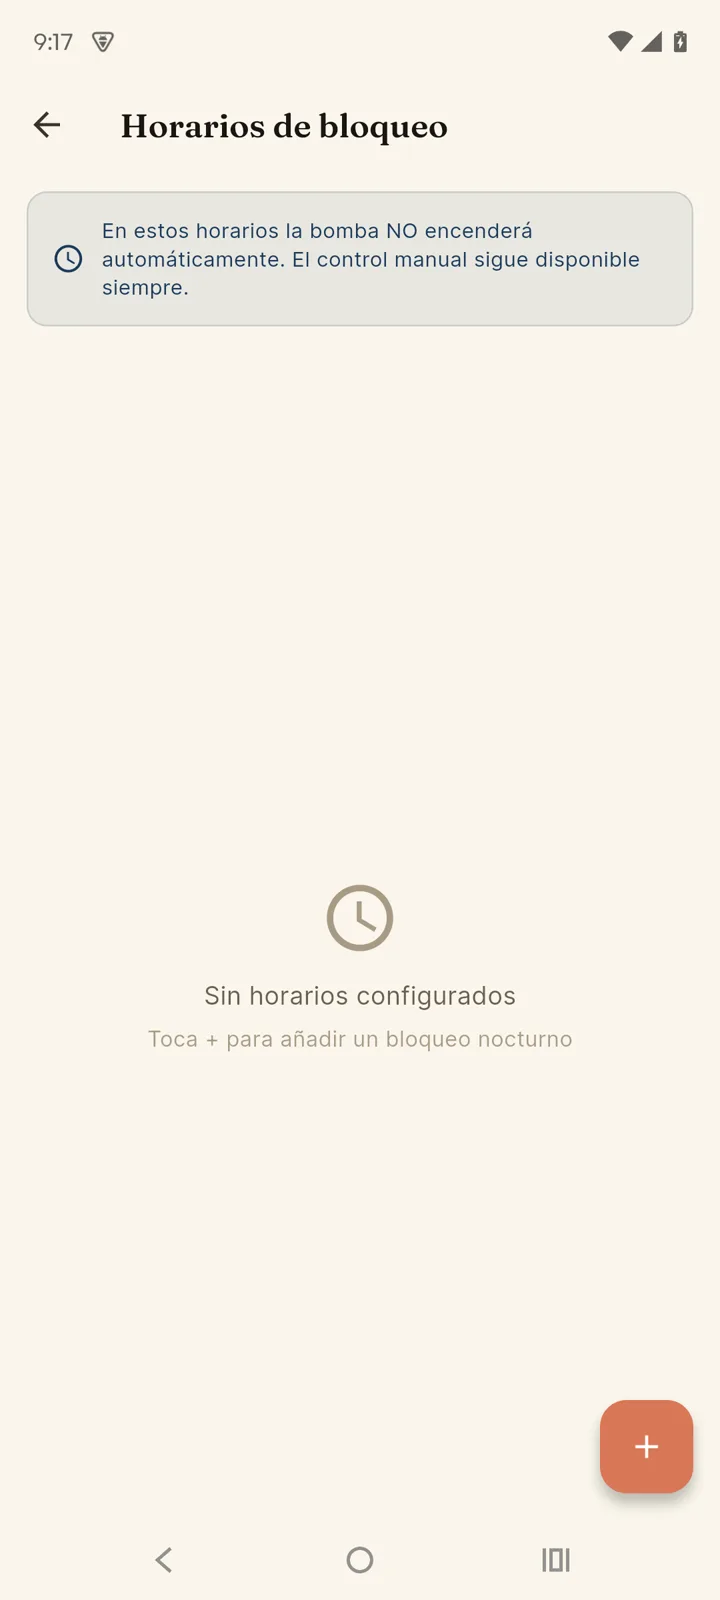
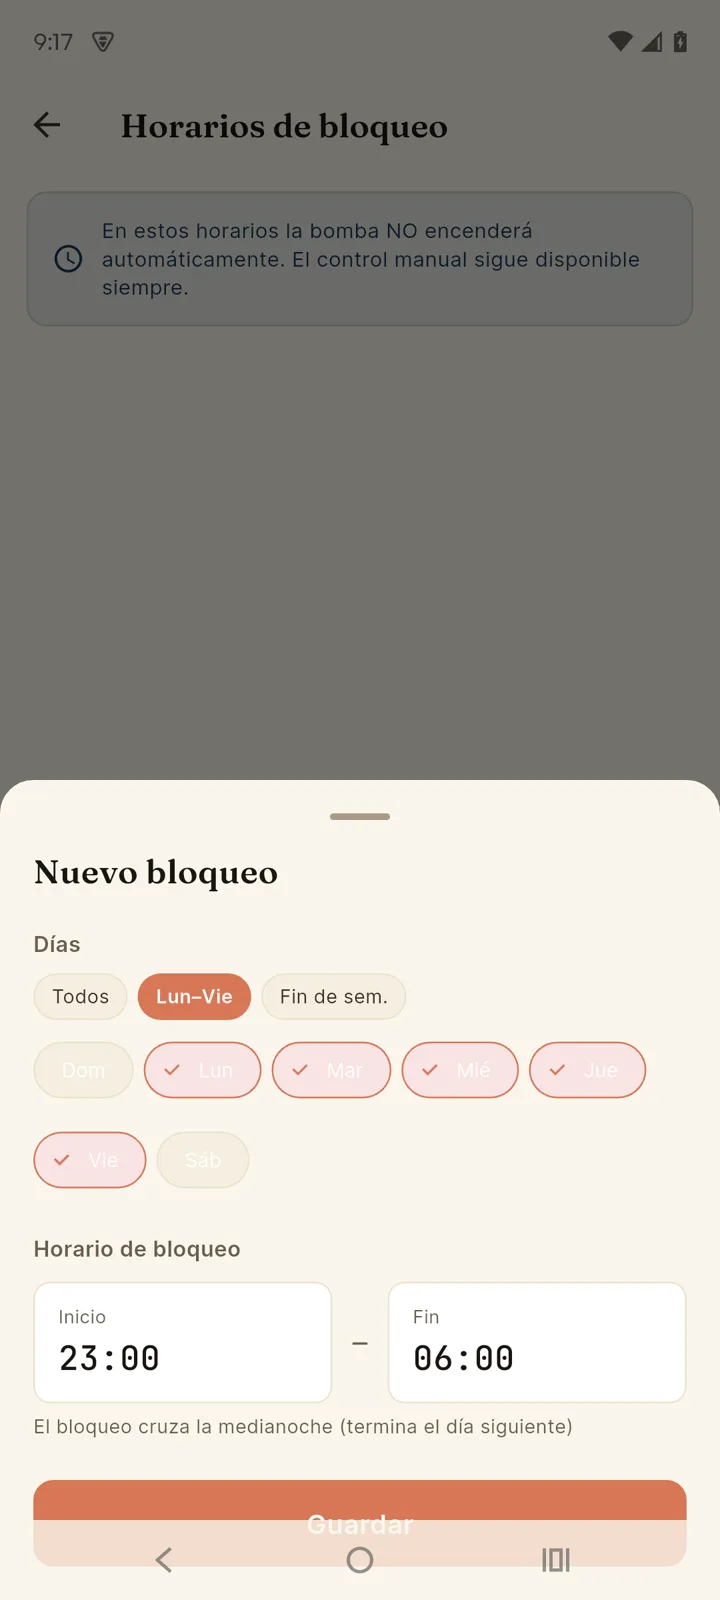
- Tap + to create a block.
- Pick the days (shortcuts: Mon–Fri, Weekend, or tap individual days).
- Set start and end. If the end is earlier than the start (e.g. 22:00 → 06:00), the block crosses midnight and ends the next day — the app tells you.
- Save. While a block is active, the main screen shows a notice.
- To change a block, tap it in the list; the switch pauses it without deleting it.
- Times are your phone's: the block is saved with its time zone. If one was created in a different zone, its card says so (for example, "Havana time").
Schedules require the device to be linked to the cloud(the server programs and watches them). The Block schedules entry shows up in Settings once you're signed in to your account; if the device isn't linked yet, the app offers to link it right there.
Firmware updates
Firmware is the device's internal software. We publish improvements and fixes you can install from the app underSettings → Update firmware.
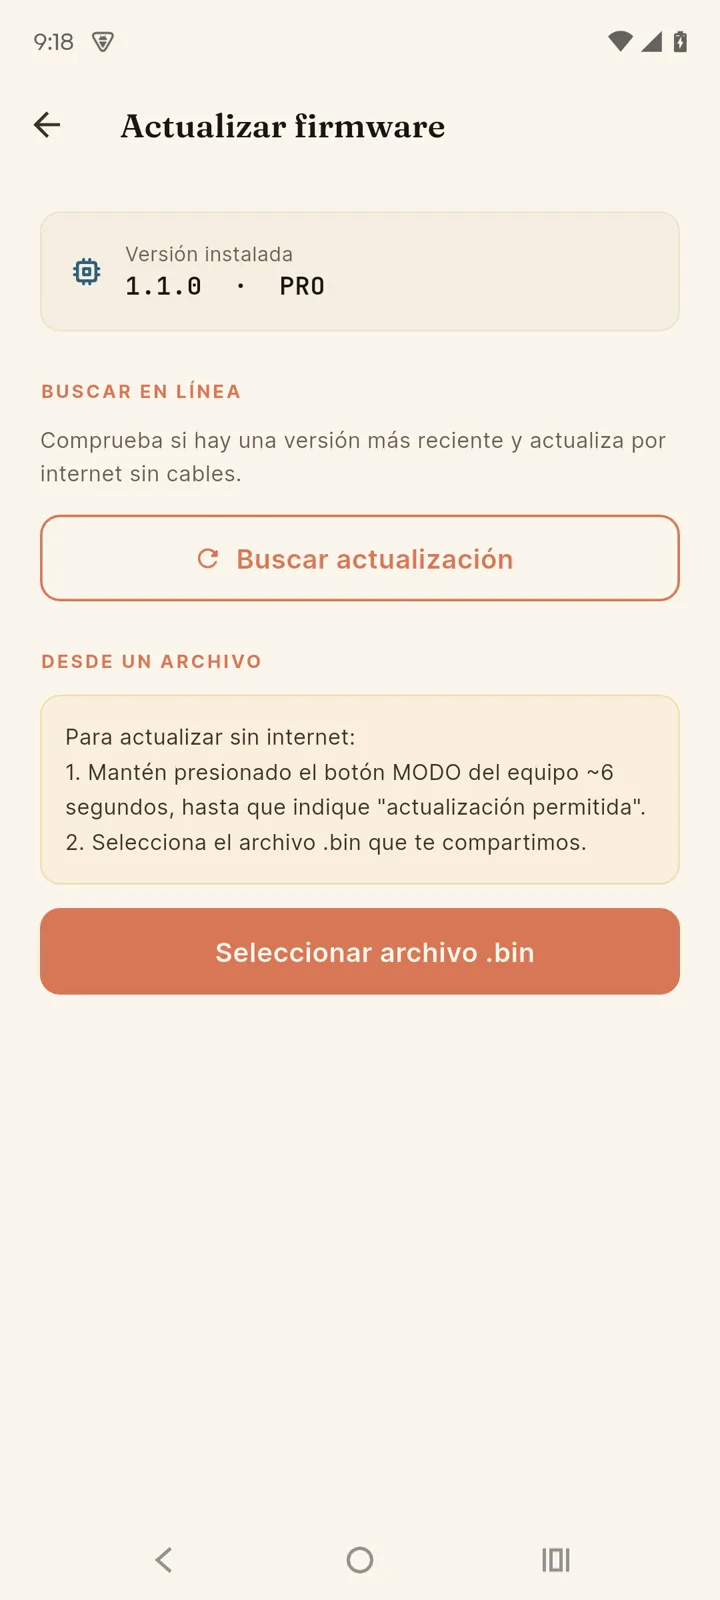
Check online
With the device linked to the cloud (unlinked, this section doesn't show and only the file option remains), tap"Check for update": if there's a newer version, tap "Update now". The app downloads the file over the internet and then installs it on the device over yourlocal WiFi network — that's why this option only shows up when your phone is on the same network as the pump. The device installs and restarts by itself within a minute or two.
From a file (no internet)
- Get the official
.binfile (we share it through support channels). - Hold the device's MODE button until the screen reads "Suelta para actualizar" (release to update, at 6 seconds) and release it. You'll see "Actualizar desde la app 5min" (update from the app): you have 5 minutes to send the file.
- In the app, tap "Select .bin file" and pick the file. Before sending it, the app checks that it's a firmware for your model of device, and won't upload it otherwise. Don't close the app while it uploads.
Both update paths require being on the same WiFi network as the device — firmware is never downloaded directly from the internet inside the device, it always goes through your phone.
Updating the device's web page
Besides the firmware, the device stores its own web page (the one you see if you type its IP into a browser). It updates separately, fromSettings → Update firmware → Embedded web, with the same "Check for update" button — and, like that button, it only shows with the device linked to the cloud.
They're two independent updates on purpose: updating the page never touches your settings (WiFi, calibration, thresholds, schedules), and updating the firmware never changes the page. You can do one without the other, in any order.
Pump location (optional)
Under Settings → Sharing and cloud → Register the pump's location you can record where the pump is installed using your phone's GPS. The option shows up once the device is linked to the cloud. It's completely optional and only the Tinajón Pro team sees it, in aggregate — it helps us know in which regions the product is used.